
Written by Atlas Steve. Last reviewed: 2026-02-19.
Found an issue? See the Editorial Policy for correction standards.
Atlas Arcade is one of the best ways to earn free Atlas Bucks without spending real money. You download games, hit milestones, and get AB credited to your account. But not every offer is worth your time, and the system has quirks that can cost you if you don't know about them upfront.
Here are three offers that are often strong when they show up in your catalog with a high payout, and exactly how to clear them without spending.
How Atlas Arcade Actually Works
Atlas Arcade is a rewards portal inside Atlas Earth where you earn AB by either playing third-party games for tracked time or completing specific in-game objectives, depending on the offer.
A few things you need to know before starting any offer:
Rewards vary per player. Atlas Reality states that missions and rewards are calculated individually based on marketplace factors outside their control. The AB totals and milestones in this guide reflect what we've seen, but yours may differ. One player might see Coin Master paying 800 AB while another sees 3,000+ AB for the same game.
Tracking must be enabled. On iOS, enable "Allow Apps to Request to Track" and accept tracking for both Atlas Earth and the Arcade game. On Android, enable usage access time tracking. Without this, you won't get credit.
Prior installs can disqualify you. If you've played or installed the game before on that device (even outside Atlas Arcade), you may never get credit. Atlas support calls this out as a common issue.
Rewards can take up to 24 hours to appear. Don't panic if AB doesn't show up immediately.
Finish early. Offers typically give around 90 days, but progress reporting can lag. Players have been denied credit for completions that happened in the final hours. Finish major milestones at least 48-72 hours before the timer ends.
How to Spot a Good Offer
Before committing to any game, check your offer details. A strong offer usually has:
- Payout weighted toward early/mid milestones (you get paid even if you stop short)
- "Reach level X" or "complete stage X" goals rather than pure time-tracking (time-based tracking can be unreliable)
- No milestones that require in-app purchases
Watch out for offers with confusing objectives, payouts gated entirely at the end, or tasks that seem impossible. If something looks off, screenshot your progress and contact support early rather than waiting until the last day.
#1: Coin Master (Best Overall)
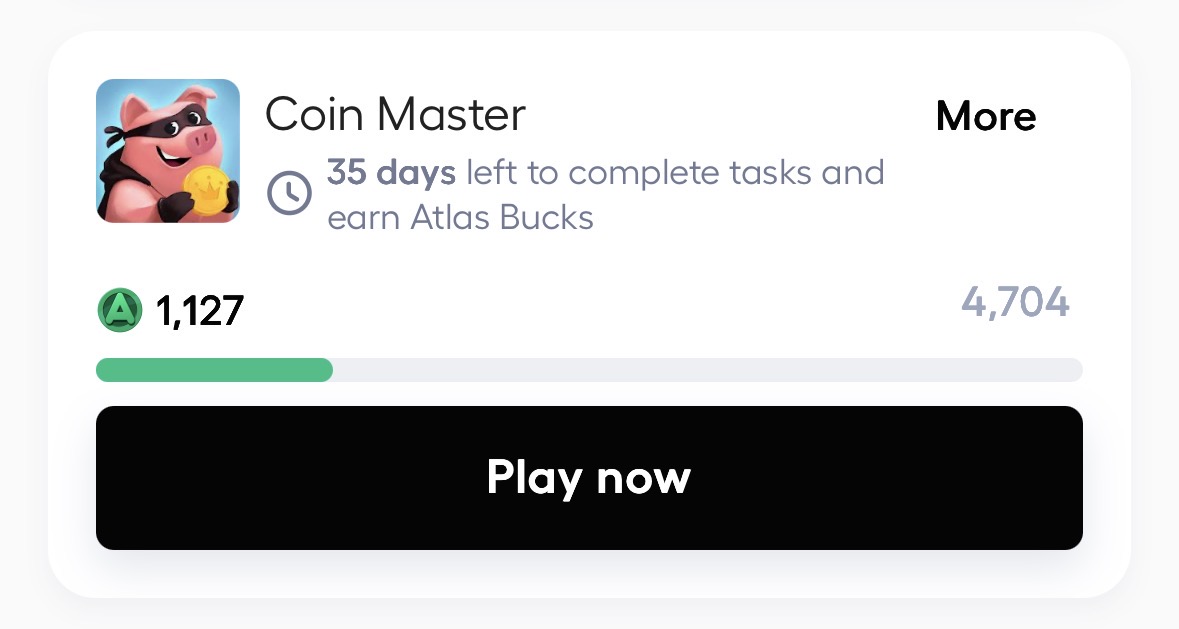
Effort: Low | Daily time: 10-30 minutes
Coin Master is a casual slot machine and village building game. Spin a wheel to earn coins, spend coins to upgrade your village, complete it, move to the next one. It's basically mindless, which is exactly why it's the best Arcade offer for most players.
When Coin Master shows up in your catalog with a high AB payout, take it. The game is simple, the milestones are straightforward, and you can run it in the background while doing other things.
How to Complete It Fast
Collect free spin links every day. This is the single most important tip. Coin Master's official social media accounts post free spin links daily. Sites like Pocket Gamer and LEVVVEL aggregate them. Each link gives 10-400 spins and expires within about 3 days. Bookmark one of these sites and check it daily.
Use higher bet multipliers when you have spins to burn. The spin multiplier increases your raid coin gains significantly. When you're low on spins, stick to 1x. When you're sitting on hundreds of spins from free links, push the multiplier higher to maximize coin earnings per spin. The exact thresholds are a judgment call based on your spin count.
Spend coins immediately. Don't hoard them. Other players can raid you and steal them. Dump everything into village upgrades as soon as you have it.
Unlock and feed Foxy. Pets unlock at Village 4. Foxy digs an extra spot during raids, increasing your haul. Keep her fed so she stays active.
Watch for events. Save spins for active events when possible. The bonus rewards help you push through villages faster.
Realistic Timeline
How fast you progress depends heavily on your spin supply (free links, friend gifts, events) and the specific milestones in your offer. Active players who collect daily free spin links during good events can push through villages quickly, but don't assume a specific pace. Focus on consistent daily play and you should clear it well before the time limit.
#2: RAID: Shadow Legends (Best for Gamers)
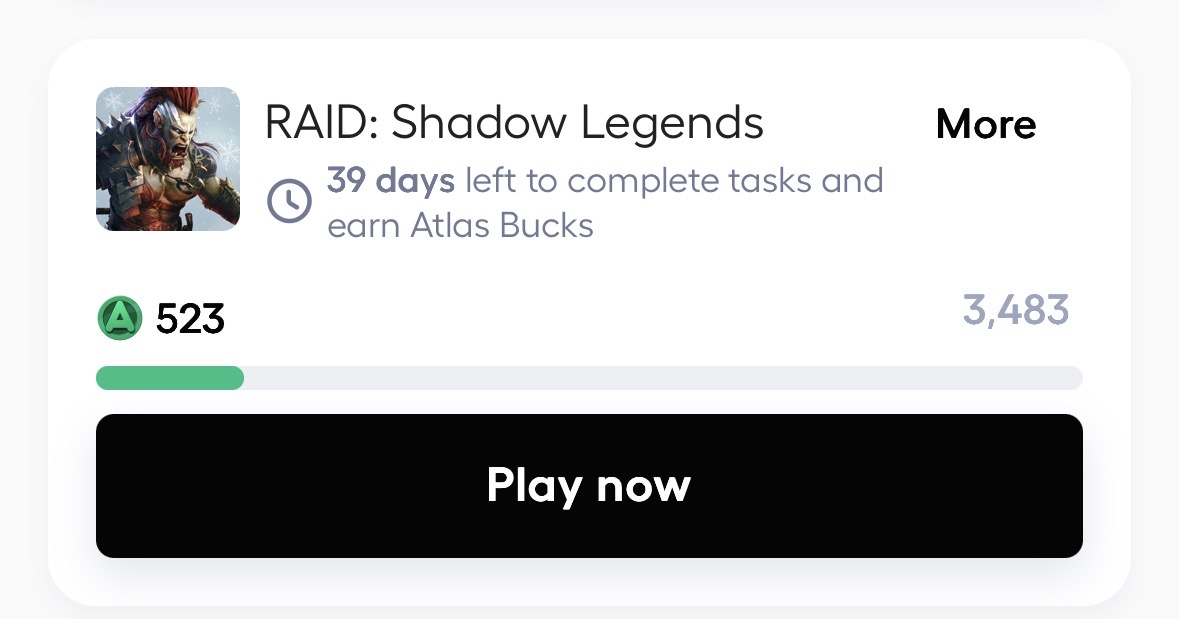
Effort: Medium-High | Daily time: 30-60 minutes
RAID is a turn-based RPG where you collect champions, level them up, and push through campaign stages. It's the most demanding of the three offers but pays well if your payout is high. If you enjoy RPGs, this won't feel like work.
Day 1 Critical Steps
Pick Kael as your starter. He's widely considered the strongest starter champion with AoE Poison abilities and broad early usefulness. A single 6-star Kael can solo the Brutal campaign, which is where you'll be farming.
Redeem a new-player promo code. Plarium lets new accounts redeem one new-player promo code. Check Plarium's current official code list for what's available. Codes change frequently, so don't rely on specific ones from old guides. Important: on iOS, promo code redemption has been disabled in recent app versions. You may need to redeem via the web or another platform.
Join a clan on day 1. Even a random active clan gives you access to Clan Boss, which is a primary source of shards, skill tomes, and other valuable resources. Use all your Clan Boss keys every day.
How to Progress Fast
Focus everything on Kael. Get him to 6-stars before leveling anyone else. The biggest F2P mistake is spreading resources across too many champions early.
Farm Brutal 12-3. Once Kael can carry it, this is the most silver-efficient farming stage. Bring 3 "food" champions to level them up while Kael solos the stage. (Some players prefer 12-6 for pure XP.)
Never let energy cap. Always be spending it. Complete daily quests, use all Clan Boss keys, and spend gems on energy refills during double XP events.
Realistic Timeline
The full offer requires consistent daily sessions. Missing days hurts because you lose daily energy regeneration and Clan Boss keys you can't get back. Plan for 30-60 minutes a day and don't leave milestones for the final week.
#3: Bitcoin Miner: Idle Tycoon (Easiest)
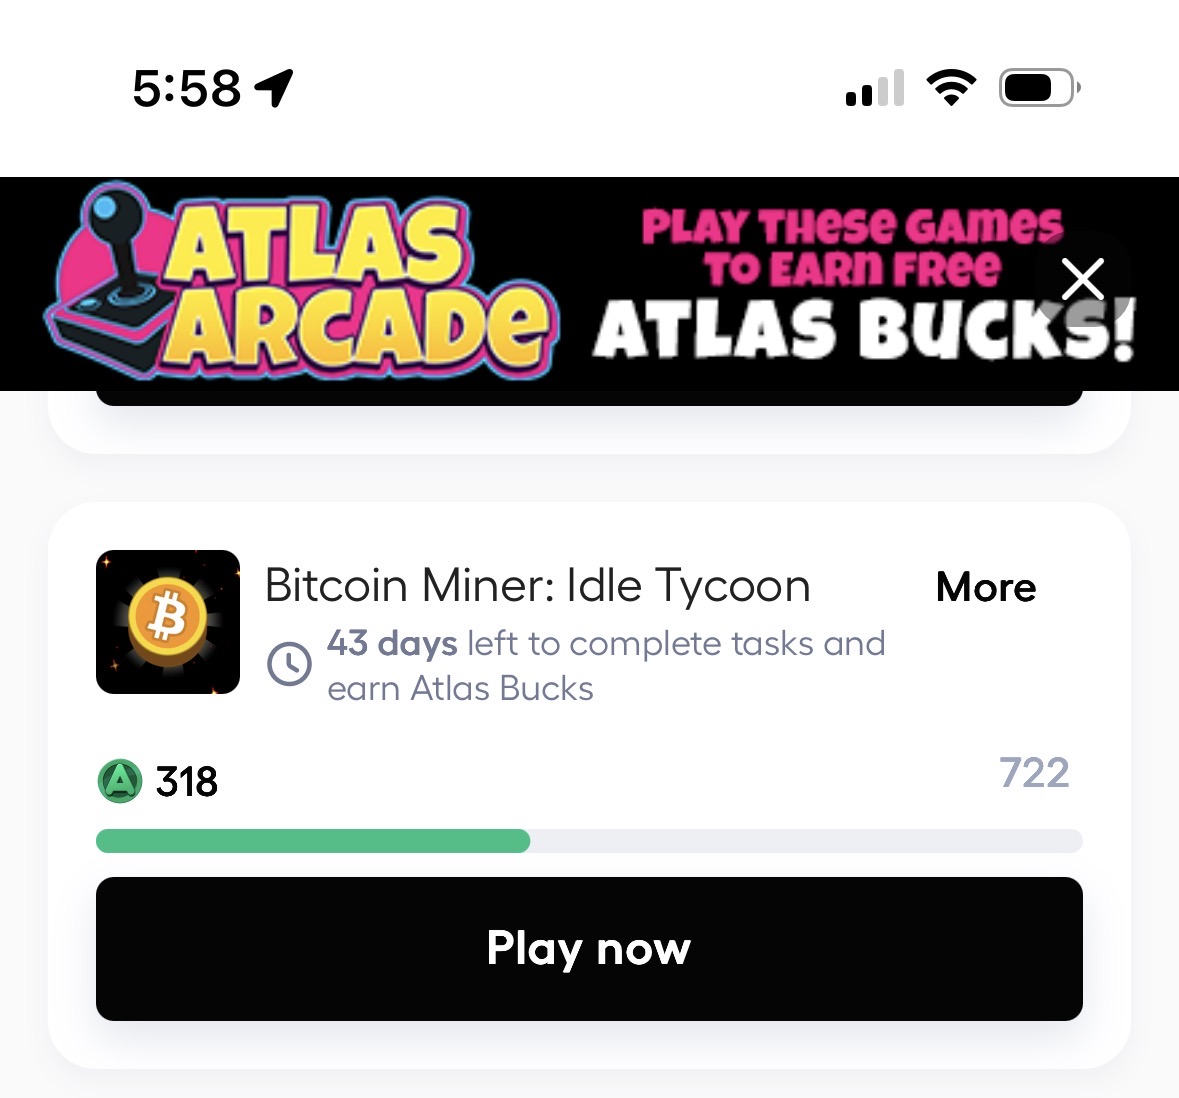
Effort: Very Low | Daily time: 5-15 minutes
Bitcoin Miner is an idle tycoon game where you tap to collect virtual cryptocurrencies, hire developers, and sell your portfolio for GPUs that permanently boost your earning rate. Earnings continue while you're out of the game. The AB reward is usually the lowest of the three, but the effort is almost nothing, making it perfect to run alongside the other offers.
How to Complete It
Log in daily. Streak rewards increase each consecutive day. Don't break the chain.
Follow the mission tracker. The missions at the top of the screen guide you to the next progression step. Just do what they say.
Prestige regularly. When your earnings slow down, sell your portfolio for GPUs and rebuild. Each reset takes about 15 minutes but you come back much stronger. This is the core mechanic, don't avoid it.
Collect offline earnings. Check in periodically, collect what you've earned while away, watch an ad to double it, close the app.
Watch out for confusing objectives. Some Bitcoin Miner Arcade tasks have unclear wording. For example, "reach row 20" actually means row 10 in the second unlocked city (rows continue counting from where the first city left off). If an objective looks impossible, screenshot your progress and open a support ticket early. Don't wait until the last day.
Realistic Timeline
This is the most passive offer. 5-15 minutes a day over a few weeks should clear it easily.
Spending Your AB Without Hurting Your Rent
If you clear all three offers and your payouts are in the range shown above, you could earn around 8,900+ AB. That's roughly 89 parcels at 100 AB each. But before you buy them all at once, check your boost tier.
In the US, buying parcels can push you through multiple tier drops. For example, if you're sitting at 150 parcels (30x boost) and buy 89 more, you'd land at 239 parcels, which means you've crossed through:
- The 20x tier (151-220 parcels)
- Into the 15x tier (221-290 parcels)
That's two multiplier drops. Your total rent might still go up because you have more parcels, but the increase per parcel is much smaller than it was at 30x.
You have two smart options:
- Tier jump deliberately. Buy enough parcels at once that your total boosted rent increases despite the multiplier drop. Use the rent calculator to model the before and after.
- Invest in badges instead. Passport badge boosts are permanent, stack with ad boosts, and don't affect your tier. If you're near the top of a bracket, badges give you more income without risking a drop. See the badge guide for the math.
The right choice depends on your current parcel count and rarity mix. Plug your numbers into the calculator before spending.